19
2012
Testing Mecanim + Biped

Tried to follow the mecanim tutorial from here: http://www.youtube.com/watch?v=QGXns8GemU0 (Unity 4 – Using Mecanim)
Had to do few things differently to make it work..(also the current UI seems to be different from that video?)
Here’s the (modified) steps from the video to get your own biped up & running
Mecanim Biped Guy + Movement Script
- *Create Biped in Max *Skin it (I used some ready skinned character)
- Export to unity as fbx
- Select the model in unity project window
- Inspector, [x] Create Avatar
- *Import the whole movement animations folder from the mecanim tutorial http://netstorage.unity3d.com/unity/MecanimSampleBeta7.zip
- Create Animation Controller (in project window)
- Assign it to your guy
- Show/Open Controller tab
- Drag & drop “Idle” from those imported animations to the controller stage (Animations/Idles/Idle)
- Its highlighted in orange, so it’s the default clip
- Right click: Create state > From new blend tree
- Rename it to “Runs”
- Double click it (Blend Tree)
- *Note: Top of the controller tab, you have: Base Layer > Blend Tree (click “Base Layer” to get back to root)
- Select your blendtree
- Inspector: Press + (Add Motion Field)
- Add: RunLeft
- Add: Run
- Add: RunRight
- *Note: If you restart unity in between, its not easy to get back to editing the controller..(?)
- To see preview: Select your Blend tree from stage, inspector has preview window at bottom
- Press play at the inspector preview window, your guy starts running
- You can drag the Blend parameter, to blend between the 3 different runs
- Go back to base layer
- Right click on top of “idle”, select Create Transition
- Connect/drag the line to runs
- Right click on top of “runs”, select Create Transition
- Connect/drag the line to idle
- Add events (press +)
- Speed (float)
- Direction (float)
- Jump (Boolean)
- Select the arrow going from “idle” to “runs”
- In inspector, you see conditions (different from tutorial video)
- Make condition: Greater : Speed : 0.1 (that means, we go to “Runs”, if speed value is greater than 0.1)
- Select the arrow going from “runs” to “idle”
- Make condition: Less : Speed : 0.1 (that means, we go to “idle”, if speed value is less than 0.1)
- Drag the Jump in to stage
- from Animations / Jump / Jump
- Create Transitions between Jump & Runs (to & back)
- Select transition line from “runs” to “jump”
- Make condition to: If | Jump (that means, if jump == true, we go to jump)
- Select transition line from “jump” to “runs”
- Keep default condition: Exit Time : … (it means, at the last 10% of the animation time, we start to go back to other “runs”)
- Add this script to our guy in scene (for movement)
- AvatarCtrl.cs (script below)
- Select your camera
- Add SmoothFollow script
- Assign your guy as follow target
- Test it
- problem: its running on wrong directions..
- fix: Select blend tree
- Set dropdown parameter: Direction (it was speed?)
- Uncheck [x] Automate thresholds
- for runleft: -1
- for: run: 0
- for: runright: 1
- check [x] Automate thresholds again
- Because GetAxis returns (-1 to 1)
PROBLEMS:
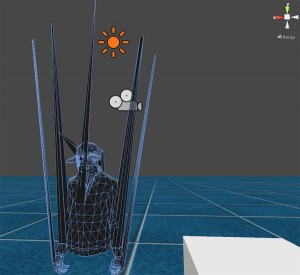
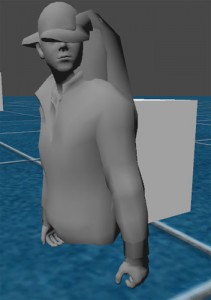
– For some reason, my biped is normal size in editor, but in play mode it explodes to 100m size.. Solved: Had to set model import scale to default 0.01 (instead of 0.001), but the model is 100 meters tall.. I guess need to scale it ready on 3D software..
– At first it was running in strange directions, had to do that threshold setting manually..
– In the preview window, I didn’t see the animations using my biped..
– Theres some large values visible on the blend window for direction.. eventhough automatic thresholds are on?
— AvatarCtrl.cs —
using UnityEngine;
using System.Collections;
public class AvatarCtrl : MonoBehaviour {
protected Animator animator;
public float DirectionDampTime = 0.25f;
void Start () {
animator = GetComponent<Animator>();
}
void Update () {
animator.SetBool("Jump", Input.GetButton("Fire1") );
float h = Input.GetAxis("Horizontal");
float v = Input.GetAxis("Vertical");
animator.SetFloat("Speed", h*h+v*v);
animator.SetFloat("Direction", h, DirectionDampTime, Time.deltaTime);
}
}
—
Some images of broken biped imports.. (character looks fine in editor, but once you hit play it explodes..)
Related Posts
4 Comments + Add Comment
Leave a comment to Pärtel Lang
Recent posts
- LudumDare59 : Signal
- Unity Editor: Tree Generator
- Leaf/Foliage Generator Tools (Runs in Browser)
- Testing Unity AI Beta
- Ways to Support UnityCoder Development
- Using UI Slider to Create 5-Star Rating Element
- Game Music Library For Unity (editor plugin)
- Fontastic : Easily Test Fonts in Unity Editor!
- GeoTiff Importer & Terrain Generator for Unity
- Create Baked DropShadow for UI images
- .JP2 Ortho Image Converter to PNG/JPG/TIFF
- Convert LAS/LAZ/PLY pointclouds to GLTF (GLB) Point Meshes (standalone converter)
Recent Comments
- on Sprite Sheet Flip Book Shader
- on Sprite Sheet Flip Book Shader
- on [Asset Store] PolygonCollider2D Optimizer
- on Trajectory Test Scene 2.0
- on Vector3 maths for dummies!
- on UnityHub 3.6.0: Remove Version Control & Cloud Dashboard columns
- on Using RenderDoc with Unity (graphics debugger)
- on UI Scroll View automatic Content height
Coin:
CUgDSbRqFcAumDSAcdKDvuXsw26VdkJe8C8WGUQHBAGS
 An article by


“For some reason, my biped is normal size in editor, but in play mode it explodes to 100m size.. Solved: Had to set model import scale to default 0.01 (instead of 0.001), but the model is 100 meters tall.. I guess need to scale it ready on 3D software..”
I struggled with this for a long time and after desperately trying to scale Max’s bipeds using voodoo and what not, i discovered you can avoid this problem in Unity by just reconfiguring your avatar after changing the import scale. You’ll have to reset the pose and (just in case) mapping, then hit apply and done.
Thanks! I’ll try that 🙂 (I did try to press just about every button last time, maybe it has been improved for the current version)
Thanks!! It works for me. Now I have my own biped character rigged with skin in 3ds max runnig and jumping in Unity without make any animation. It´s a dream.
Some info here also:
“we do not support all the roll bone configuration from biped. If possible re-parent your roll bone, like Bip001 R ForeTwist should be under Bip001 R ForeArm. ”
http://forum.unity3d.com/threads/184827-Mecanim-3ds-Max-Studio